I’d like to share with you how we at Happylab integrate our Formlabs Form2 SLA 3D printer with Fabman. It includes busy/idle detection an semi-automatic charging based on material usage.
Basically, the workflow consists of four parts:
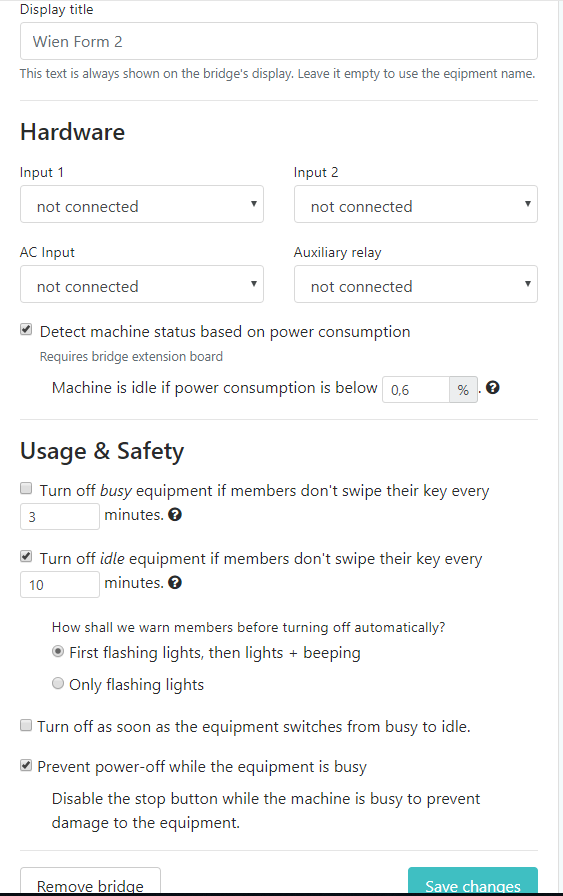
1) Install the Fabman Bridge
We connect the Form 2 to a Fabman Bridge and activate the busy/idle detection based on power consumption (threshold 0.6%). Furthermore, we configure the machine to automatically switch off after 10 minutes when it is idle and we prevent power-off while it is busy.
2) Download printer log
In regular time intervals (usually before we create invoices for our members) we download the printer log file from the Formlabs Dashboard.
3) Parse log file and link print jobs to Fabman activity log
This PHP code parses the downloaded log file and determines the corresponding activity log entry in Fabman. The printjob details from the log file are written to the metadata field of the activity log.
4) Create charges
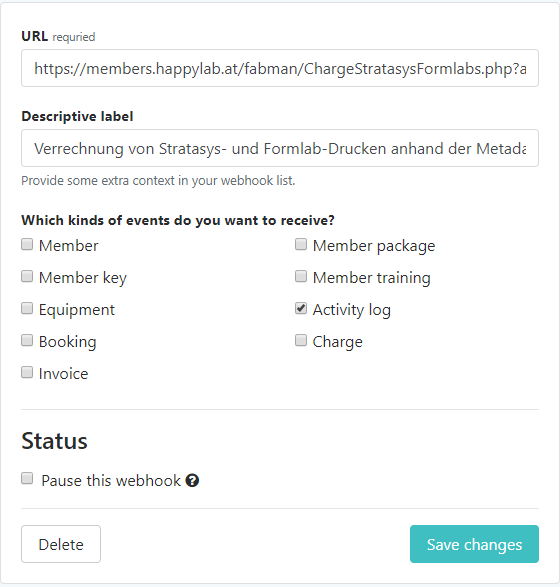
When the metadata field is updated (see step 3 above) a webhook is triggered. This webhook runs this PHP script, which creates a charge based on the prinjob details in the metadate field.
I hope this article can help you to simplify managing you Formlabs printer. You may use the code at you own risk! It is not very well tested yet. Any feedback ist welcome.
We have separated it into a machine-specific (“parse log file”) and a machine-independent (“create charge”) part. In our example, the “parse log file” script is a Form2-specific way to get accounting relevant information and write them into the metadata field of the log entry. Contrary, the “create charge” part works independently of a particular machine, as long as the metadata provide the necessary information in the right format.
At Happylab, we use the same webhook also for charging of Stratasys Dimension/Elite/uPrint printjobs. Just the way how we get the printjob data from the Stratasys machines is different. I hope I’ll find time soon to write an article about the Stratasys integration.
thanks for posting these scripts. I’m interested more in the Webhook one - I find it much easier to learn how to code by reading and understanding examples than by reading the documentation.
I have 2 questions though:
You only process print jobs that were terminated normally, i.e. $obj->{‘details’}->{‘log’}->{‘stopType’} == ‘normal’. Of course the bridge turns off automatically when the job is finished/stopped, so most cases should have stopType==normal. Are there cases you need to exclude with this check? Shouldn’t all log entries with a metadata field “price” be charged?
This webhook is called after the time-based price is calculated, is correct? Therefore you overwrite the calculated price, if there is any?
I assume you are asking about this webhook script, which creates the charges, wenn a job is finished.
ad question 1) The script processes every finished job, regardsless of the stop type:
if ( isset($obj->{‘details’}->{‘log’}->{‘stopType’}) and
isset($obj->{‘details’}->{‘log’}->{‘metadata’}) and
(in_array((string)$obj->{‘details’}->{‘log’}->{‘resource’}, $resources, true))
) // bridge has been stopped and equipment is in the list of resources to be charged
{
I just check, whether stoptype is set without validating its value. If it is not set, the job is still running an I therefore ignore it.
ad question 2) I’ve not tried to us it in combination with automatic time-based charges. You should the end up with two charges (one from the time-based charging and one from the webhook).
IMPORTANT NOTICE – This Post Is Outdated!
Please use the new and improved version instead: